Inserting a Template
Using the "Simple Response Templates" area above the Jira comments / activity tabs, a user can insert templates into an issue.
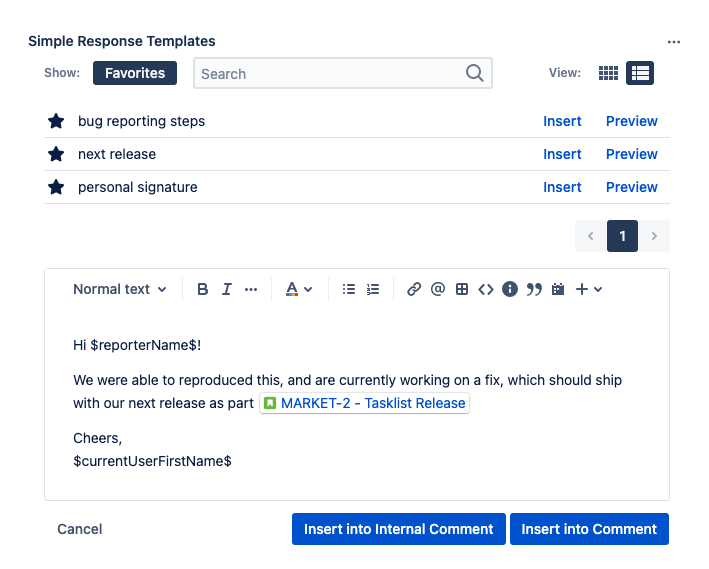
The panel shows all the templates that are applicable to the current issue that the user has access to, as defined by the template scope / visibility settings.
Anatomy of the Response Templates Area
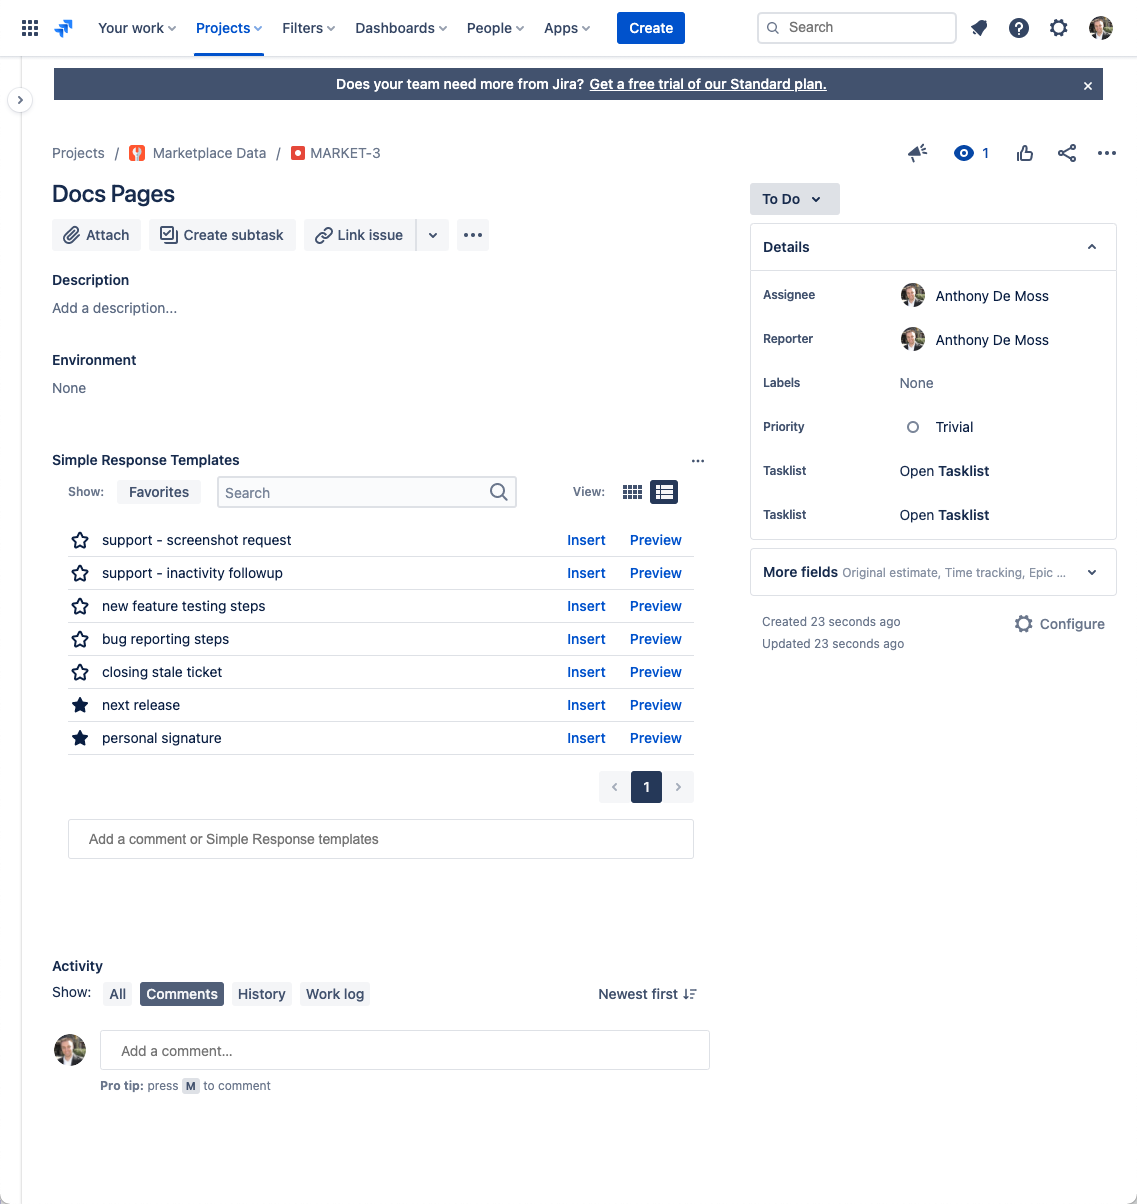
The response templates area in an issue is split into 3 sections:
Search Bar
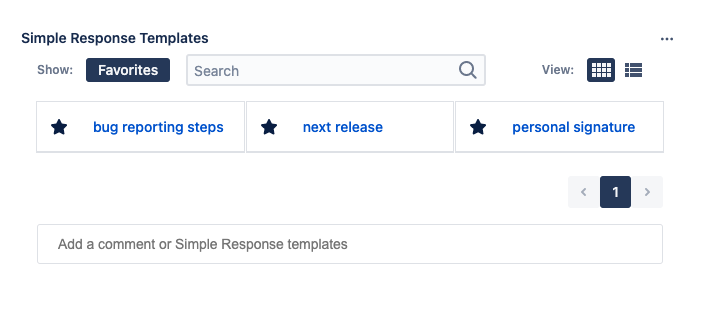
The search bar allows you to filter the templates based on name, label and/or by favorites.
Additionally, you can change how the templates are displayed (as a list or as a set of cards) by toggling the view mode on the right.
Note:Setting the favorites filter, or changing the view is automatically saved in your browser, and the next time you come back to any Issue, the last settings you used are automatically applied again.
Template List
The template list shows the templates the user has access to. Any templates that don't match the current visibility scope, or the current users doesn't have permissions to, are simply omitted from the list.
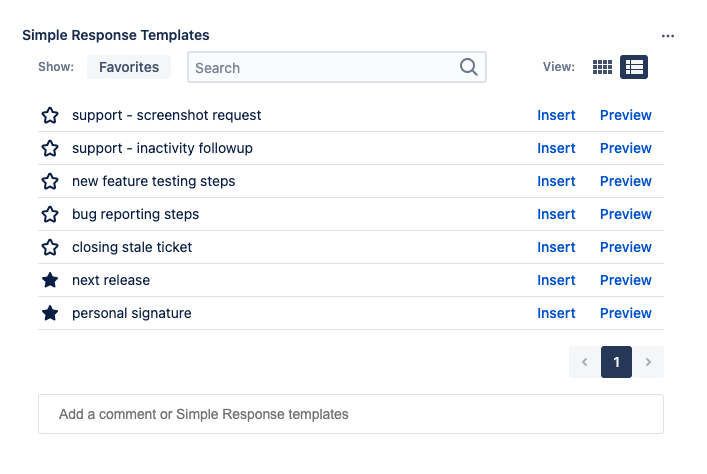
Templates can be previewed by clicking on the Preview action, which expands the template, and shows you the contents of the template before inserting it.
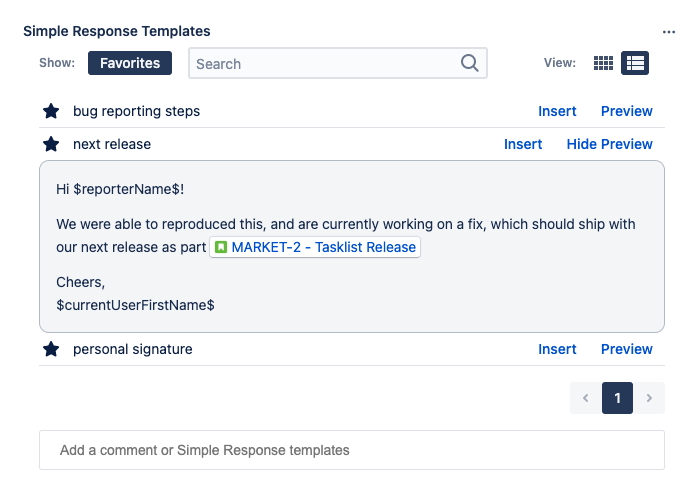
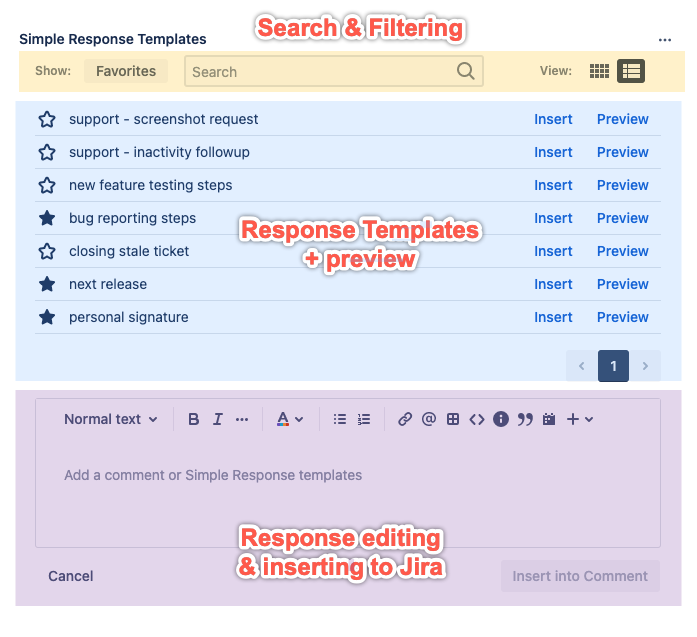
To insert a template, click on the Insert button, which will automatically expand the Response Commenting area and insert the selected template into the commenting area. From there, you can make any changes or additions to the content before inserting it into the Jira issue.
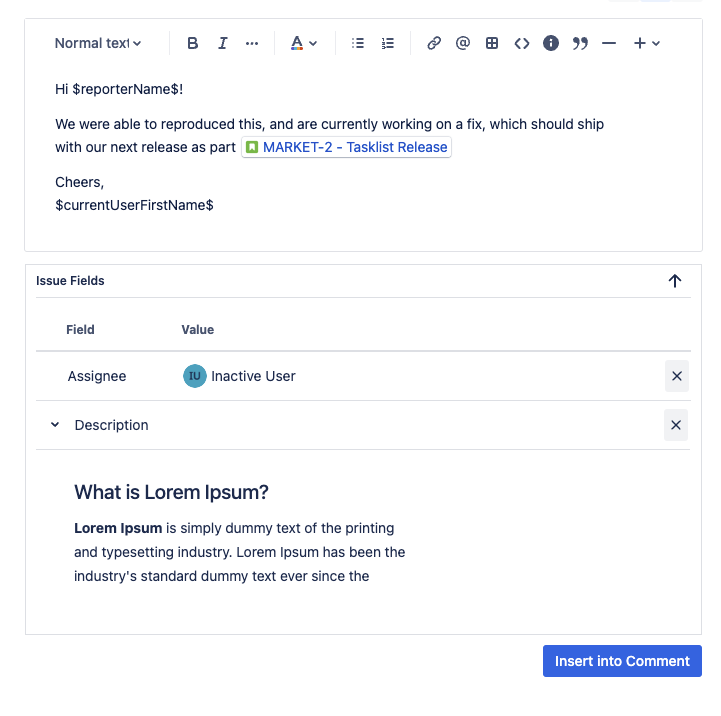
Response Comments Area
The response comments fields is where a template is initially inserted. Think of this as a staging area that allow you to make any necessary edits and additions before inserting the template into the Jira issue.
In addition to comment (with your template body), the area shows whether the template you're inserting is going to change any issue fields.
How to Insert a template
To insert a template, select the template and click the "insert" button.
The content of the template is then inserted into the response commenting field wherever the cursor currently is. If the response commenting area is collapsed, it will automatically be expanded.
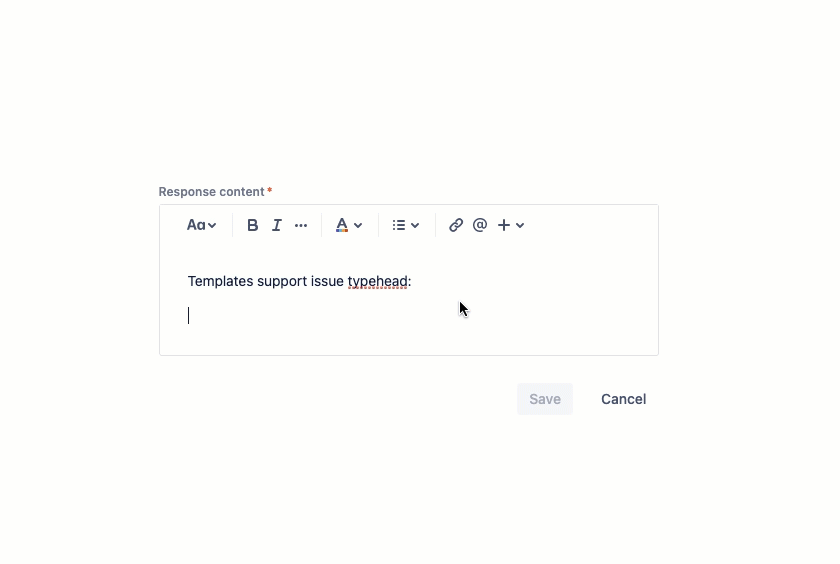
The response commenting field generally works like the Jira commenting field. It largely allows the same content you can put in a comment. Additionally, you can mention users and issues, and use variables.
Since templates are added where the cursor currently resides in the commenting field, you could combine multiple templates, simply by inserting them one after another.
Tip:If the template(s) have issue fields that they change, they will show up below the commenting field. It will list out all the fields that will be changed when the template is inserted. If you combine multiple templates together, then the set of fields will stack from all the used templates.
If you don't want some of the fields, you can simply remove them by clicking on the
Xto the right of the field.
Once you're ready, click on the "Insert into Comment" button, and a new comment with your content will be added to the Jira issue. Any issue fields that were part of the template are also changed, and the issue should automatically refresh to show all the changes.
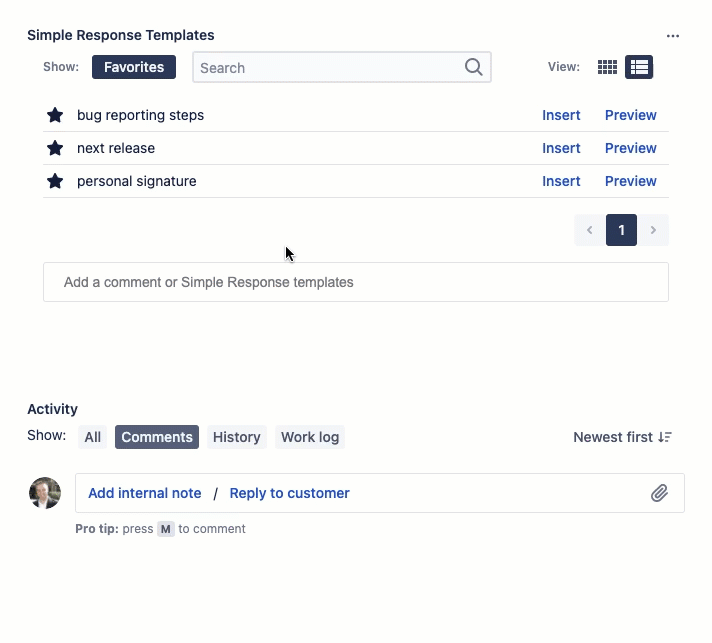
If you're working on a Service Management support ticket, you will see two separate insert buttons. One for a private comment and one for a regular comment that is shared with customers.
Tip:Of course, you can simply use the response commenting field, even without a template. The typeahead functionality, variables, and everything else will work just the same.
A Note about why there is a second commenting area:You might ask why there is an entirely separate area for the response templates, and why there might be a second commenting area.
The answer to that is quite simple: because Jira Cloud doesn't allow vendors to integrate with, or extend the Jira editor in any way. Unlike Jira Server, or Confluence, where it is possible to hook into the editor and provide custom actions, marcros, and so forth, the Jira editor is completely locked down. Unfortunately, that means we have to take up valuable space on an issue to make templates easily accessible.
On the bright side, we've decided to take this opportunity to not only focus on inserting Resposne templates from the second commenting area, but to start adding some other nice to have functionality, like autocomplete for mentioning issues for example.